In this post, I’ll walk you through how to get started on your homelab journey using a mini PC to self-host applications such as Nextcloud (as a Google Drive alternative), Immich App (as a Google Photos replacement), and Jellyfin (for streaming your own movie collection)—all managed by Proxmox, utilizing LXC and Docker containers.
Why Build a Homelab?
- Privacy & Control: Host your data at home, your data stays within your home LAN.
- Customization: Tailor your setup to match your exact storage, app, and streaming needs.
- Learning Opportunity: Deepen your understanding of networking, security, containers, and virtualization.
Hardware: The Mini PC – Efficient & Capable
A mini PC is ideal for beginners in homelab. It’s compact, energy-efficient, and can pack a serious punch. Here are some considerations:
- Low Power CPU: Mini PCs often come with low TDP (Thermal Design Power) CPUs. This helps keep your power bill low—even while running multiple services 24/7.
- 16GB RAM Minimum: While some lighter setups might survive on 8GB, you’ll thank yourself for starting with 16GB. It gives you ample headroom to run containers and future-proof as you add services.
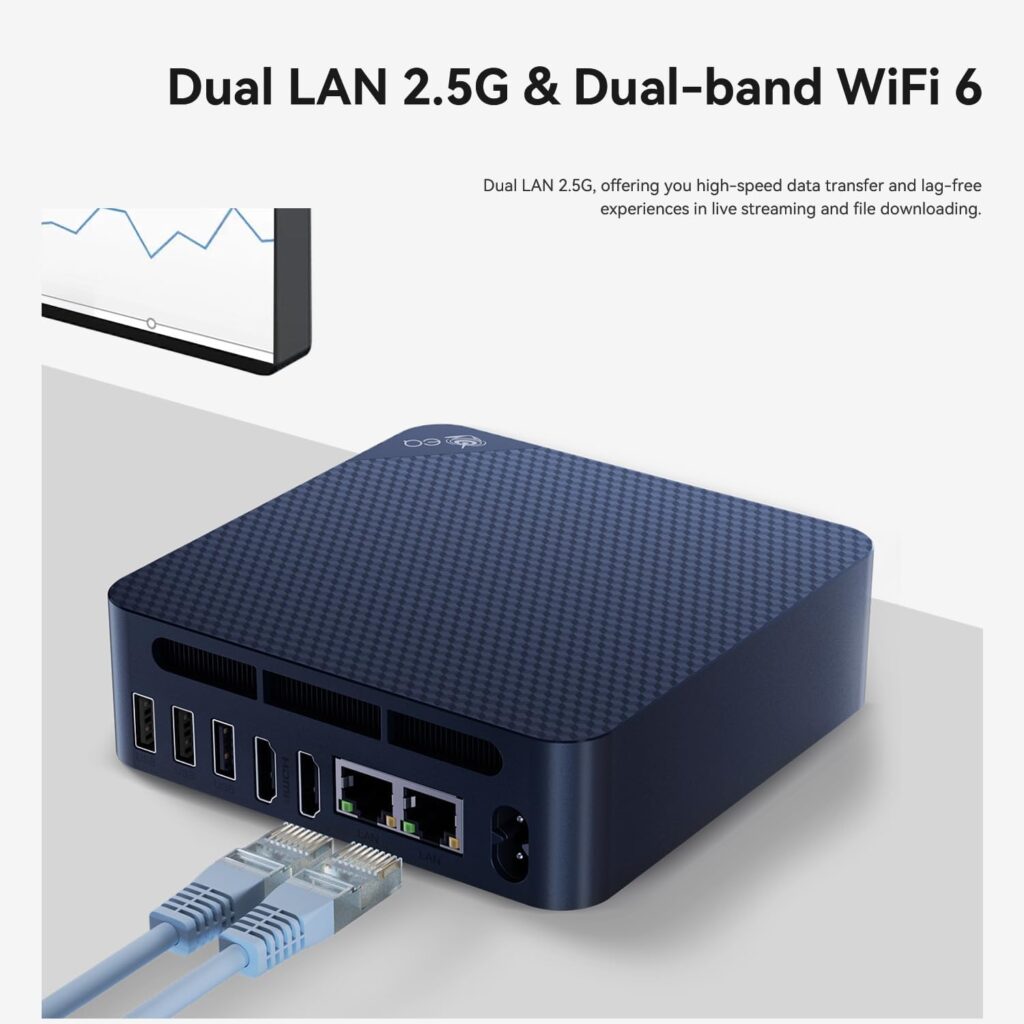
- Dual 2.5G LAN Ports: Not a must, but with dual 2.5G LAN you’ll get better speed when transferring data between Proxmox clusters. You can split the network traffic between the VMs & Containers use and for Proxmox itself to manage backups and migrate VMs/Containers between clusters.
Some Mini PC I’d recommend:
Getting Started: The Quick Steps
- Choose and purchase your Mini PC
- Install a reliable NVMe drive.
- Flash Proxmox VE onto a USB stick, install on Mini PC.
- Login to Proxmox Web UI from any browser.
- Deploy LXC containers and Docker for each app:
- Nextcloud (LXC or Docker)
- Immich App (Docker)
- Jellyfin (Docker)
- Configure backups, secure your setup, and enjoy private, local control!
Why Power and RAM Matter
- Low Power = Lower electricity bills and quieter operation (fanless, often!).
- 16GB+ RAM = Smooth operation, ability to run multiple apps simultaneously, future service expansion.
- Dual 2.5G LAN = Next-level networking, ready for link aggregation, VLANs, or even clustering mini PCs as your lab grows!